Friday, May 15, 2015

Hiking in Sequoia & King's Canyon National Parks - Part 1

Hello!

I'm trying to write a few posts to schedule before I begin my residency training.

I was able to take a trip to Sequoia & King's Canyon National Parks recently, so I thought I would share some of my photos, and some advice, with you.


Like I talked about in my Niagara post, there are some unique challenges presented by "over-photographed" locations. One of the difficulties you might encounter is crowds. Popular national parks can become just as crowded as Disney World during peak season, making it difficult to get the shots you want. You may fare better visiting off-season, even though certain elements of the park may be inaccessible or closed due to weather.

(Parts of Sequoia & King's Canyon are closed through the middle of May for winter).


By visiting off-season, I was able to get this classic photograph without any tourists in the frame. Of course, if you like studying humanity's interactions with nature, going during peak season may be just for you!
To an extent, by visiting Sequoia/King's Canyon instead of the more popular (and very close by) Yosemite, you'll be dodging some of the tourist traffic.


Another way to deal with overcrowding is to avoid the "big ticket" locations. Taking less-traveled trails may bring you unique vistas without having to fight through 20 tourists to get your images. The picture above is taken from the Hump Trail in Sequoia National Park. (The same view can be seen from the more popular Watchtower Trail, but this trail is closed until the end of May.)


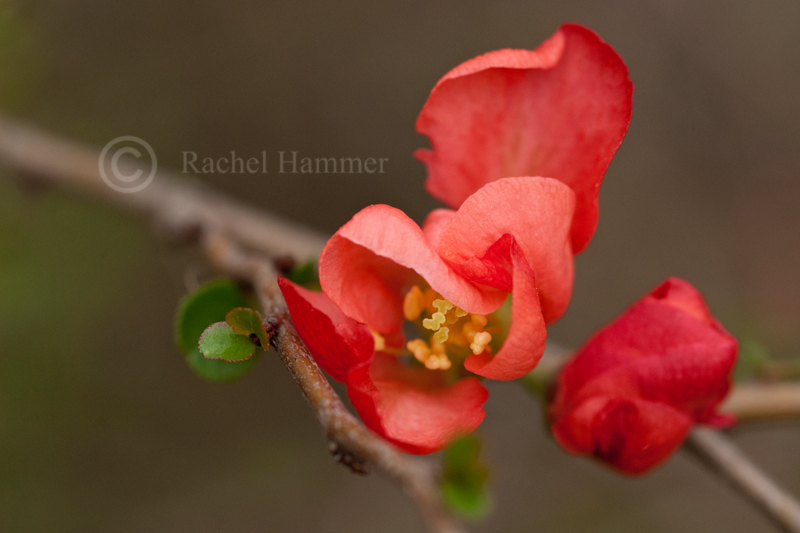
Whatever you do, don't forget to experiment. A park may be "known" for particular features (Sequoia is, obviously, known for its sequoia trees), but don't feel obligated to dedicate your time to these landmarks if you don't want to. As evidenced by this post, I had more fun shooting mountain landscapes from Sequoia than I did shooting forests, even though this is not the "notable" feature of this park.

As a follow-up to this post on composition, notice how the trees in the foreground lend interest to the mountains behind them. It's always a good idea to include foreground elements in landscape photographs to "ground" the images and give them a sense of place.

Okay, that's it for me right now. Like I said, unfortunately, my posts will continue to be short and somewhat sporadic for a while. But, on to you -- what did you do this summer?

 Please remember to share, follow, and subscribe via the fancy sidebar options! Here is my redbubble and my 500px.  Here is my tumblr and here I am on bloglovin.

Wednesday, May 6, 2015

Tidepooling in California & Some Updates

Hello all!

Thanks to all of you who have been reading along! I am sad to announce, if you had not noticed, that my posts will continue to be sporadic. Soon I will be starting my residency and won't have that much time for photography, let alone blogging. That being said, I will try to post when I have content. I will also be posting my images on 500px (you can find and follow my page here) so you can keep up with me that way.

In other news, I have re-opened my redbubble account (actually I just made a new account), so if you are interested in purchasing prints or gifts, you can do so here. If there's something that isn't available that you would like, feel free to message me!

All right, on to the tidepool critters.

Tidepools are something we don't really have in Florida, so I was excited to get a chance to explore some while visiting my friend in San Francisco.


The key thing with tidepooling is, of course, going at low tide. You'll want to check a tide chart before you head out, because higher tides will submerge the more interesting animals.


Be persistent and observant. Many tidepool animals, like this lined shore crab, are shy and are very sensitive to movement. If you wait (still) and watch, they may feel bold enough to scuttle out from their lairs, offering you the opportunity to capture their glory.

I would recommend a macro lens.


Here is another lined shore crab. Incorporating their habitat into the shot lends context and interest. Tidepools are pretty unique places, so there's no reason to leave them out of the shot!


All right, so this isn't pretty and it isn't a tidepool critter, but I thought it was interesting so I wanted to include it. Always keep an eye out for other subjects, even if you visit a locale with a particular shot in mind!

Okay, again, apologies for the continued sparse postings and brief postings, but life must go on.
 Please remember to share, follow, and subscribe via the fancy sidebar options! Here is my redbubble and my 500px.  Here is my tumblr and here I am on bloglovin.

Friday, March 6, 2015

Under Your Feet: Abstract Winter Macro Photography

Hello all! I hope this post finds you well. Like I discussed in this post last year, winter nature photography can be difficult. I mean, who really wants to go outside when it's cold, right? Well, I hope to convince you that there are lots of great reasons to try macro photography in the winter.


Searching for Patterns

Snow and ice add interesting detail to nature. However, instead of always choosing to compose a typical winter landscape blanketed in snow, try focusing in on abstract patterns created by this strange precipitation.

The photo above is of an oak tree, frosted with snow. By zooming in on familiar objects, foreign and unusual topographies are revealed. This, of course, is the quest of the macro photographer - but you don't need a macro lens to achieve this. This photo above was taken with a standard kit lens, for example.

Ice Worship

I prefer ice to snow for winter macros. While snow covers detail, ice often accentuates it, creating strange bubbles and patterns on top of boring objects.


The way the ice emphasized the outlines of these twigs turns an utterly unremarkable composition into an intriguing image. 


Similarly here. The gravel peeking up above the ice layer adds another element of depth to the pattern.


Here, the contrast of the green grass with the icy winter feel of the rest of the photograph provides visual interest.

The theme with these winter ice macros is looking down. That is, I walked outside, looked around at my apartment complex in the ice, and then looked at my feet. I realized that I was standing on beautiful macro subjects that I had almost passed by, because I almost didn't look.

So, grab your camera, get outside, and don't forget to look at your feet every once in a while.

What's your favorite winter photography tip? Let me know in the comments!

Want to see more tips? Check back every Friday for a new post. Click here to follow me on Tumblr and here to follow me on Bloglovin! Don't forget you can also use the nifty sidebar to subscribe via email or RSS feed

Friday, February 27, 2015

Spring Interlude: Flower Photography Tips

Hello all! We've had a bit of warm weather down here in Texas, so spring flowers have already started blooming. I thought I would take the opportunity to talk a bit more about flower photography basics.


Let's get started.

Step One: Think about Focus

Flowers are complicated because they have lots of parts. Think about it: there are petals, leaves, stamens, and maybe even other features designed to attract pollinators. From a nature photography standpoint, these many pieces create a problem, because each exists in a different plane of focus. The pistils and stamens leap forward, leaves droop back toward the ground, and petals hover delicately in between. You can't really capture all of these elements in crisp focus in one frame - so what do you focus on?


Take these two photos, for example. Which one do you like best? You can see that the focus is slightly different between them, with the second image focusing on the pistils closest to the viewer, rendering the center of the flower soft.

I actually prefer the first image, but I didn't know this while I was shooting. This brings me to my point about how to solve the focus problem - you should experiment in the field, taking different pictures of the same flower but changing your point of focus. Manual focus is very helpful for this.

Step Two: Corral a Composition

Flowers seem to pose one of two compositional problems for the photographer: they are either spectacularly, awkwardly alone, or are clumsily smashed together with many of their brethren. How do you address these problems?


The Awkward Loner

There are a couple ways to deal with the awkward loner. One method, as demonstrated in the photo above, is to include other elements of the plant in the picture. Here, the diagonal branch adds dynamic movement to a static picture of a red flower, alone. The small, green leaves lend contrast and extra detail that help situate the flower in its environment. In short, take a picture of the whole plant, rather than just the flower. This is also a good tip if you do not own macro equipment.

The other treatment the awkward loner often gets is demonstrated by the pictures I showed you earlier. Here, let's look at one again.


A frame-filling macro eliminates the clumsiness of a big flower on a tall, spindly stalk. The downside of this method is that it requires dedicated macro equipment.

The "Too Many Friends" Flower 

Ever try to take a group picture? How about a group picture of children? Then you already know what I'm talking about when I discuss the difficulty of achieving a coherent composition in group photos. Sometimes flowers grow in groups. They grow haphazardly, aggressively, each straining toward the sun in a different direction. It can be difficult to create a pleasing image in these circumstances.


There are a couple of things to consider:

1. Use depth of field to your advantage. You can see in the image above that the flowers in the background are in a different plane of focus from the subject flower. Thus they are softer and not as distracting.

2. Get closer. Crop distracting elements out of the frame, such as large leaves or flowers that are steadfastly not helping your composition.

3. Understand the motion of the picture. Flowers can be difficult to photograph because they are static and can become boring. A group of flowers can lend interest. Notice how the subject flower is pointing upward, while the background flowers are pointing down. This visual conflict simulates motion and encourages the viewer to keep looking.

All right! Those are my solutions to some of the biggest problems I struggle with in flower photography. Now it's your turn - what are some of your best tips for flower photography?

If you enjoyed this post, you can find me here on Tumblr or follow me here on Bloglovin'. In addition, you can utilize the snazzy sidebar items to subscribe via email or RSS feed. Check back every Friday for a new article!
Thanks for reading!

Friday, February 20, 2015

The (Only) 5 Things You Need to Start Nature Photography


This week I bring you...a list! That's right - we're going to talk about nature photography - what you need, and how to get started. Contrary to what you might think, you only need 5 things to start doing nature photography. So, read on to find out!

ITEM #1: ANY CAMERA

Many people falsely believe that they need tons of expensive equipment to get into nature photography. While it is true that some aspects of nature photography do require specialized equipment, all any beginner nature photographer needs is a camera.

It doesn't even have to be a DSLR.

Taken with the iPhone 5 + HDR


As I talk about here and here, you can even use your smartphone.

If you do have some disposable income, an entry-level DSLR is a worthy investment, but don't feel like you "need" to buy an expensive camera to take great pictures. You just don't -- and an expensive piece of equipment won't automatically guarantee beautiful works of art.

#2: A PLACE OUTSIDE

Another myth about nature photography is that it requires one to travel to exotic locales. And, again, if you have the time and money to travel to such places - go for it! But I don't. And you don't need to, either. Like I mention here, the only thing you need for nature photography is a little square of nature.


If you are willing to travel a little bit, there are many beautiful and wonderful state parks. A great resource is to google "your state" + "state parks." Many states have informative websites with maps and widgets that can help you find some lovely green space within a short drive of your house.

For example:


However, even your backyard (if you have one), can host a bevy of interesting creatures and plants. Don't neglect easily accessible areas because they seem unexciting - you never know what you might find!

Grasshopper Nymph spotted in the flower pot outside my apartment

#3: LIGHT

Light, as I discuss here, is very important for photography. You already know this. If you strip away complicated equipment and advanced techniques, the lighting of your subject matter becomes even more important. Luckily, lighting is free - it just takes a little extra effort for you to get up early in the morning (I know, I know).


See how the golden quality of the light on the trees makes them seem more alive? The dappling of the light also adds motion and interest to a still scene, as it encourages the viewer's eye to move around the frame.

This photograph was taken with no special equipment, aside from a DSLR. I used a simple "kit" lens that came with the camera when I bought it. I did not even use a tripod.

With the advances being made in smartphone cameras, they are more and more able to handle dappled lighting conditions like the one above. Additionally, HDR functionality improves their performance in situations with contrast-y lighting. So, in short: you can also use your smartphone, your point-and-shoot camera, whatever, to take images like these.

The keys to a good photograph are the same regardless of what camera you use: lighting, composition, subject matter.

#4: PHOTO EDITING SOFTWARE

Digital cameras are designed to produce low-contrast images so that detail is held in both the highlights and the shadows. However, this means that images usually come out of the camera needing some kind of tweaking. There are many programs you can use to edit your photography, some of which are free. I have a post here in which I detail my own image processing habits.

I usually edit photographs to look how I saw the scene in real life

Gimp is a very powerful free image editing program that mimics photoshop itself. For the iPhone, I personally like the Photoshop Express app (which is free). Picasa is another free editing tool that I haven't personally used.

For someone who is looking to spend a little bit of money, Photoshop Elements is a great program that should satisfy all of your editing desires.

#5: A TRIPOD

Okay, so this one is really a bonus item. You don't need a tripod, but it is a really handy tool to have. As you know, a tripod will stabilize your camera and prevent your shaky hands from blurring the image. 


Tripods become essential for wildlife photography that employs long telephoto lenses which magnify camera shake. However, they are also indispensable tools for the landscape photographer, evening/night photographer, and, really, anyone who can't hold a camera stable (me).

You can even find versions now for smartphones and small point-and-shoot cameras.

So, have you been inspired to start shooting nature images? What equipment do you like the best? Let me know in the comments!
Check back next Friday for the next installment of...TwoFeetPhoto. Please remember to share, follow, and subscribe via the fancy sidebar options! Here is my tumblr and here I am on bloglovin.


Friday, February 13, 2015

Photography Basics Part IV: What Lens is Good for What?

Hello hello! Thanks for tuning in to this week's episode of...TwoFeetPhoto. Today, we will be talking about camera equipment - namely, lenses. Which camera lenses do you need? What are they for? Eager to find out? Read on!

You may want to click here for links to my other Photography Basics articles.

First: a disclaimer about focal length. Most digital cameras, including the one I shoot with, are half sensor cameras. Because the image is recorded on a sensor that is half the size, there is an extra magnification factor. Thus, on half sensor cameras, the actual focal length of a lens is 1.5X what it says on the box. As a result, it can be difficult to get wide angle views on half sensor cameras because the effective focal length of a lens (unless it is designed specifically for a half sensor camera) is increased by half.

15mm - 100mm

Lenses in this range are best for landscape, architecture, and (human or pet) portraiture. Lenses at the low end of this range can produce wide angle "fisheye" effects, which may or may not be desirable.


Lenses like these are best for subjects that are large or not very far away; they have shorter focal lengths. These types of lenses do not suffer as much from motion blur because they do not have the magnification power of longer lenses.


100 - 200mm

This in-between lens length is generally best for large mammal photography, but can also be used for sports, travel, and landscape photography.


These lenses will not have enough magnification power to capture smaller or more flighty animals, such as birds. This is also the focal length at which you need to start worrying about motion blur, as the higher magnification power of the lens will also magnify unwanted movements of the camera. Remember, you should aim for your shutter speed to be greater than the focal length of your lens, or (better) use a tripod.

300mm - 600mm

This is animal photography range, including birds. Larger and less shy birds should be easy to photograph from 300, but if you are photographing animals that are very small or very far away, you will want to invest in the 600mm glass. Oh yeah, and you will need a tripod.


Lenses in the 300-400mm range make capturing portraits of larger birds and animals that are not timid reasonably easy.


These lenses have the magnification power to allow you to stand back and not frighten or disturb your subjects while still achieving pleasing images.

This image of baby egrets was captured with a 2x teleconverter stacked on top of a 300mm lens. Teleconverters come in different strengths and will increase the magnification power of your main lens, although they decrease the light available to the camera and can also degrade image quality. For smaller subjects like these, you will want a lens of at least 500mm.

Macro Lenses

There are different types of "special effect" lens available, of which I find the macro lens to be the best investment, particularly for the nature photographer. I have an entire post dedicated to macro photography, so you can head over here to read it if you're interested.

In short, macro lenses produce true close-up images, making them indispensable for those of us interested in small.


I hope this has demystified the many lens choices available for the photography consumer, and that it has helped you identify which lenses you actually need.

So, what is your favorite lens? Let me know in the comments below!
Want to see more tips? Check back every Friday for a new post. Click here to follow me on Tumblr and here to follow me on Bloglovin! Don't forget you can also use the nifty sidebar to subscribe via email or RSS feed.

Friday, February 6, 2015

Let's Go to the Beach! Beach Photography

Hello all! Are you one for relaxing on the beach while snowstorms bury the northeast? Well, I have the February post for you! Beaches can be excellent venues for nature photography, particularly in the winter. So pack your sunglasses and grab your tripod - we're going to learn how to improve your beach and vacation nature photography.

Beach Photography


Lover's Key - Ft. Myers, FL

Beaches provide unique challenges for the nature photographer, but they can be birding and wildlife hotspots, as well as excellent landscape subjects. So what are some tips for shooting on the beach?

Lighting, Lighting, Lighting

Beaches can be harsh. The lack of other land formations and trees to break up the sunlight means that unflattering, blinding overhead light is often a reality. For shooting at the beach, the time of day becomes even more important for this reason. You will find it difficult to capture any pleasing images if you show up midday (although this is probably the best time to get a tan). Evening and early morning light are really essential for successful beach photography.You will notice the beginnings of the sunset in the picture above. The softening light allows detail to be captured in the shore, while the colors add visual interest to the sky. You can read more about lighting here.

Lover's Key

Of course, the uninterrupted view of the sky makes beaches excellent for photographing unusual clouds and sunsets.

Pay Attention to the Tide

Low tide is the best time to be at the beach. It's when the water is the lowest, shells are exposed, and the most wildlife comes around to see what they can snag. You can find tide charts online - just give it a quick google, and try to plan your trip accordingly.


Ruddy Turnstone, Anastasia State Park
You will find many more shorebirds and waders if you plan your trip around low tide, but you may have to sacrifice lighting quality. Here, you can see the long shadows cast by the harsh lighting. Careful exposure is required to ensure that birds with variegated feather patters, like this turnstone, are not over- or under-exposed. You may want to read about exposure compensation here.

Introduce Landscape Features to Ground Images

Like I discussed in last week's episode, including foreground, midground, and background elements can strengthen compositions. I mentioned that this was especially important for landscape photography, and beach images are no different.

Sand Dunes, Lover's Key
 Here, the sand dunes making up the foreground provide visual interest and guide the viewer's eye back towards the ocean and sky. Turning your lens away from the shoreline itself and back towards scrubland and sand dunes also provides for unusual, often overlooked, beach landscapes.

Pedestrian bridge to Lover's Key beach
 Here, I have chosen to photograph the surrounding habitat rather the beach itself. The bridge provides visual interest in the composition. Evening light is starting to turn the sky purple and pink, and is casting a warmer glow over the vegetation. Paying attention to lighting condition can take a mediocre image into an excellent one.

In short, beaches can be nature photography bonanzas - and you don't even have to stick to the same, tired sunset and shoreline images. So, what do you think? Are you planning a winter beach trip anytime soon? Let me know in the comments.

Check back next Friday for the next installment of...TwoFeetPhoto. Please remember to share, follow, and subscribe via the fancy sidebar options! Here is my tumblr and here I am on bloglovin.